
Your Cart is Empty



Last Updated: October 19, 2026
The best gold detector for beginners gets you spending weekends uncovering real treasures; the wrong choice leaves you digging bottle caps within a month.
What separates a detector that works from one that frustrates you is ease of use, performance in your local soil, and whether it will grow with your skills. At Lost Treasures, we've helped hundreds of prospectors find their first detector.
The best gold detector for beginners needs automatic ground balance for mineralized soil, a simple menu, and enough depth to find real gold. The machines below tick all three boxes and are proven in Australian conditions.
| Detector | Price | Best For | Key Strength | Battery Life |
|---|---|---|---|---|
| Nokta FindX Pro | $419.00 | Absolute beginners | Turn-on-and-go simplicity | 12 hours |
| XP ORX | $1,299.00 | Serious hobbyists | Multi-frequency gold detection | 23 hours |
| Garrett Vortex VX9 | $1,299.00 | Versatile all-terrain | Waterproof to 5 metres | 15 hours |
| The Legend 2 | $1,480.00 | Intermediate prospectors | Lightweight with dual coils | Extended runtime |
If you've never held a metal detector before, start here. The FindX Pro is designed for beginners, with almost nothing to learn.

Turn it on, select your terrain (Field, Park, Jewelry, or Beach), and sweep. The single-menu interface means no scrolling through dozens of settings, and the Target ID scale and depth indicator tell you what you've found and how deep to dig.
It's a complete kit: a 28cm waterproof coil, headphones, digger, and carrying bag. The rechargeable battery lasts 12 hours, and at $419.00 it's the most affordable entry point here.
Where it falls short is depth: it won't compete with pulse-induction detectors for deep nuggets in heavily worked ground, and its single 15 kHz frequency is less versatile across soil types. But for your first season learning the basics, it's genuinely hard to beat.
The XP ORX is a serious detector built on multi-frequency technology (21 frequencies).

At only 765 grams with the remote hip-mounted, it's the lightest detector here, and the 23-hour battery outlasts any prospecting day.
The wireless tech is lag-free from coil to remote to headphones and pairs with the MI-6 pinpointer. The menu offers four factory programs (two for gold, two for coins and relics) plus two user-defined modes.
The 5-year Australian-supported warranty and firmware updates give peace of mind. At $1,299.00 it's a step up from the FindX Pro, but it will serve you for years as your skills advance.
The tradeoff: the menu requires more engagement than the FindX Pro.
The Vortex VX9 is fully submersible to 5 metres, handling saltwater beaches, mineralized inland soil, and trashy areas. Its MD-MF technology gives simultaneous-frequency stability plus single-frequency options (5, 9, 13, 18, or 25 kHz).

The three-tiered Target ID display shows conductive and ferrous properties. Fast Mode accelerates recovery in high-trash areas, Thin Coins mode targets small hammered and gold coins, and seven detection modes plus pinpoint add flexibility without overwhelming complexity.
At $1,299.00 it matches the ORX in price, but it's heavier with shorter battery life (15 hours). Where it wins is waterproof versatility: if your prospecting involves beaches, creeks, or EMI-heavy areas, the Vortex is the safer choice.
User-controlled reaction speed lets you dial in how aggressively the detector responds, and wireless MS-3 headphones are included, a bonus many detectors charge extra for.
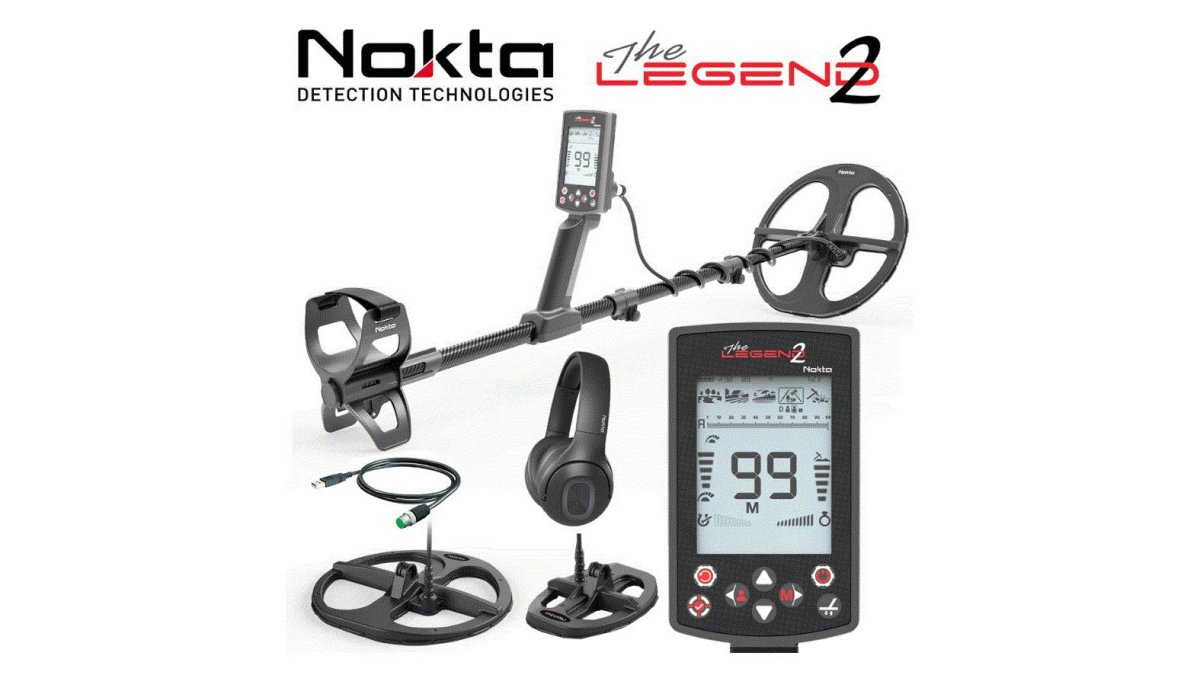
The Legend 2 is Nokta's professional-feeling detector.
It uses simultaneous multi-frequency (SMF) technology plus five selectable single frequencies, giving ORX-style adaptability in an easier package. The 99-level target ID scale is the finest here, and preset modes (Park, Field, Beach, Gold) let you start immediately.
It comes with two coils (a 28cm all-rounder and a 21cm for tight spaces and nugget hunting), low-latency Bluetooth headphones, and battery life beyond the Vortex. The carbon-fibre shaft reduces fatigue.
The real advantage emerges after your first season: wireless OTA firmware updates let Nokta push performance improvements directly to your machine. Future-proofing matters when you're investing this much.
The only genuine drawback: it's overkill if you just want to try prospecting, since you're paying for features you won't use in month one. But if you're committed to learning properly, the Legend 2 grows with your skills.
The features that matter for beginners differ from what professionals chase. Understanding what actually makes a difference, versus marketing noise, will save you money and frustration.
VLF (Very Low Frequency) detectors transmit a continuous electromagnetic signal and listen for changes when metal is nearby. They're versatile, stable in mild to moderate soil, and excellent for coins, jewellery, and small gold.
Pulse-induction (PI) detectors transmit short bursts of energy and listen for the "echo" as the pulse decays. They ignore ground mineralisation almost entirely, making them exceptional in heavily mineralized soil, but they're more expensive, heavier, and require more skill. They're overkill for beginners unless your local ground is notoriously difficult.
For your first detector, VLF is a good choice: you'll develop real prospecting skills and understand your local soil conditions, giving you the foundation to use a PI machine properly later.
Ground balance is the single most important setting for prospecting in Australian soil. Mineralized ground, red soil, black sand, iron-rich areas, creates a noisy electromagnetic environment that confuses detectors. Ground balance tells the machine to ignore the ground's natural magnetic signature and focus only on metal targets.
Automatic ground balance does this for you: press a button, the detector samples the soil, and adjusts itself. That's what you want as a beginner.
Manual ground balance requires sweeping the coil while adjusting a dial until the audio stabilises, a skill that takes practice.
The XP ORX and Garrett Vortex offer both automatic and manual options, giving you flexibility as you learn. In your first season, use automatic. Once you understand how ground balance works, experiment with manual tuning to squeeze out extra sensitivity in specific areas.
The search coil is the business end of your detector. Larger coils (28cm and up) scan more ground per sweep for faster coverage and deeper detection.
For beginners, a 28cm coil is the practical sweet spot: large enough to cover ground efficiently, sensitive enough to find small gold, and easy to handle all day.
The coil's operating frequency matters too. Higher frequencies (18-25 kHz) are more sensitive to small targets but struggle in mineralized soil. Lower frequencies (5-9 kHz) penetrate deeper and handle mineralization better.
You've bought your detector. Now what? The difference between a frustrating first day and a productive one is understanding three core settings: ground balance, sensitivity, and threshold.
Press the ground balance button. The detector samples the soil beneath your coil and adjusts itself. That's automatic ground balance.
Manual ground balance requires holding the coil steady, pressing a button, and adjusting a dial while watching the audio response until it stabilises.
Some detectors (like the Legend 2) let you use tracking ground balance, which continuously adjusts as you move across changing soil conditions.
Sensitivity controls how aggressively the detector responds to metal. Higher sensitivity finds deeper targets and smaller gold but picks up more ground noise (false signals). Lower sensitivity is quieter and more stable but misses deeper targets.
For beginners, start at 70-80% sensitivity.
Threshold is the audio baseline. Set it so you hear a faint hum when the coil is held still over ground; that hum tells you the machine is working. When you pass over metal, the audio changes, louder, quieter, or a different tone. The threshold gives you a reference point for recognising when something's different.
Here's exactly what to do when you arrive at your prospecting spot:
Turn on the detector. Select your terrain mode (Field for general prospecting, Beach for wet sand, Gold for dedicated nugget hunting). Hold the coil 15cm above the ground and press ground balance. Wait for the beep. You're done with setup.
Start sweeping. Move the coil in overlapping passes, left to right, parallel to the ground. Don't lift it between passes; keep it just above the surface. Sweep steadily, since rushing causes you to miss targets.
When you hear a signal, stop and pinpoint. Move the coil slowly over the area until you isolate the exact location. Use the pinpoint feature (usually a dedicated button) for precision. Mark the spot with a flag or marker.
Dig a plug about 15cm square and 10-15cm deep. Scan the plug to confirm the signal is still there. If it is, dig deeper or search the loose soil by hand. If the signal disappears, you've removed the target or it was false. Either way, move on.
This rhythm, sweep, pinpoint, dig, move, is your entire prospecting day. Consistency matters more than speed.
Price matters, but total ownership cost matters more.
The FindX Pro at $419.00 is the lowest entry point, and you get a complete kit with no additional purchases.
The XP ORX at $1,299.00 is a serious investment, but the 5-year warranty, firmware updates, and Australian support mean you're buying longevity.
The Garrett Vortex VX9 at $1,299.00 matches the ORX in price but offers different strengths.
The Legend 2 at $1,480.00 includes two coils and wireless headphones; bought separately, these would cost an additional $300-400.
Used detectors are options only if you're already experienced.
A common mistake is buying used because it's cheaper.
Choosing your first gold detector is about matching the machine to your commitment level and local conditions.
At Lost Treasures, we help you make this choice with confidence.
The Nokta FindX Pro at $419.00 is the best budget gold detector for beginners. It features fully automatic search modes (Field, Park, Jewelry, Beach), a simple single-menu interface, and a complete detecting set including a waterproof 28cm coil, headphones, digger, and carrying bag. With 12-hour battery life and USB rechargeable lithium battery, it eliminates the frustration of traditional batteries while keeping costs low for first-time prospectors.
Beginners should prioritise automatic ground balance to handle mineralized soil, simple menu systems with preset search modes, lightweight design (under 1.5 kg) for comfort during long sessions, and good target identification with audio feedback. Look for detectors with adjustable sensitivity levels, waterproof coils for wet ground, and rechargeable batteries. VLF detectors suit general prospecting, whilst pulse-induction models can be effective in highly mineralized ground but cost more.
Yes. The Nokta FindX Pro ($419.00) is purpose-built for beginners and includes everything needed to start: detector, coil, headphones, digger, and bag. It handles gold, coins, relics, and silver with automatic terrain switching. However, expect limitations in depth and performance in heavily mineralized soil compared to higher-priced models. Many beginners hire first to test before buying; Lost Treasures offers detector hire to help you decide if prospecting suits you.
Beyond the detector, invest in a quality pinpointer (like the Nokta Accupoint at $209.00) to locate targets precisely before digging, a sturdy digger tool, a classifier to sift through soil, and a small vial for storing finds. Wear sturdy boots, gloves, and sun protection. For heavily worked ground or tight spaces, specialist coils (such as the 5-inch Nugget Finder AUzzy at $475.00) improve small-gold detection. Most complete detector packages include basic accessories; check what's included before purchasing extras.
Comments will be approved before showing up.


